Neural network menu
Back-Propagation Neural Network ConstructorThis page lets you create a simple Multi-Layer Perceptron. The neural network is constructed on this web page. However, the page does not save the file on leaving the page, so you must save any work that you have created before leaving the page. Please read through all the following before proceeding. Specifying inputsIn this section of the page you specify the input controls that pass values to the network. At the moment the number of control types is severely limited, but I am hoping to add more in later versions. The possible control types are as follows:
N.B. Text slots are designed for accepting any positive number (decimal or whole number) up to a maximum value that you specify (e.g. you can specify a text slot that takes numbers in the range 0 to 100, or one that takes numbers in the range 0 to 4500 etc.) To create an input control, fill in a caption for the control, and select whether you want a checkbox-type input or a text slot-type input. You can also specify an upper limit if you want to create a text slot. If you don't specify a value, it will default to the range 0 - 100. N.B. If you don't fill in a caption for the input control, it will default to a blank string. (You can always edit it later). The controls that you create will appear within the rectangle below. Each control has a caption, a type (checkbox or text slot) and, if it's a text slot, a maximum value. The controls will appear in the final network in the order in which they appear below - buttons will appear alongside each control as it is created to allow it to be promoted (moved higher in the list) or demoted.
Input controls
Specifying outputsThis works in the same way as above, except that you specify the outputs from the network. The outputs can also be check boxes or text slots, and you needn't have the same number of outputs as inputs.
Output controls
Hidden nodesBy default, the number of hidden nodes in the network is the sum of the number of inputs and the number of outputs (i.e. if you have 3 inputs and 5 outputs, the network will assume that it needs 8 hidden nodes). You may find that you can get better performance from the net (i.e. a greater proportion of successful input classifications) with a different number of hidden nodes (typically more than the default). For this reason, you can enter a new number in the text slot below before you train the network. Don't forget to click on the "Update the number of hidden nodes" button after changing the number of hidden nodes. Number of hidden nodes:
N.B. If, after specifying the number of hidden nodes, you create/delete further input or outputs, the number of hidden nodes then reverts to the default (i.e. the new number of inputs + the new number of outputs), so specify the number of hidden nodes at the very end, just before you train. Yes, I agree, it's a pain, but it's tricky to create the code that overcomes this. Perhaps in a later version... Training the network
You can type the training data into the slot above, but it is more efficient to paste it in using Copy and Paste from a text file. There is no "save" facility in this program, so a text file in Notepad or something similar is the only way to save the data in any case. When you click on the button below, the program will check that the training data you have entered matches the controls that you have set up. If it does, then training will begin. The training consists of 10,000 cycles, and you can read how far it has got using the text slot on the right of the button. You can break into the process by saving the network at any stage (it doesn't matter if the count hasn't reached 10,000 - it just means that the network won't have trained as well as it might have done). (It might be worthwhile saving this page to your hard disk before doing any lengthy training, particularly if you have a slow Internet connection).
Iterations completed :
Displaying the networkWhen you have created your inputs and outputs, specified the training data and trained the network, you can then display it by clicking on the button below. It will appear in its own pop-up window with a light-yellow background. Please ensure that you have pop-ups enabled before you display the network. If pop-ups are blocked, you will get a "This site is trying to produce a pop-up" error message just above your web page. Assuming the network does appear correctly, you can then test it by specifying some test input data and clicking on the "Run" button. If the network behaves correctly, bravo! You can then go on to save it (see below). You may find, however, that it fails for some or all combinations of input data. This could be for any of these reasons:
In general, you can improve performance by addressing a combination of these causes and doing some general tinkering.
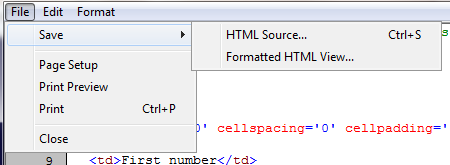
Saving the networkAs you probably know by now, there is no save facility in JavaScript. However, we can cheat a little. In order to save the network, you should do the following:
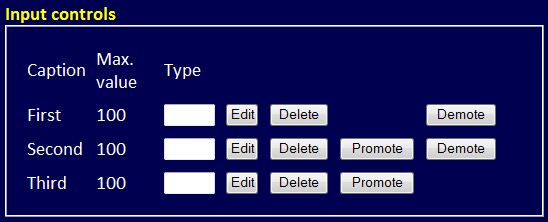
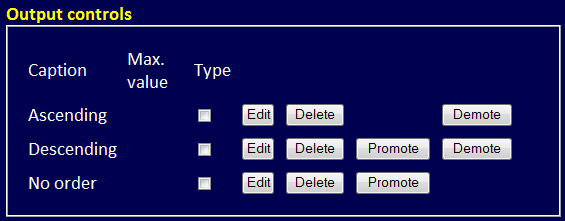
Please feel free to change the page that you create in any way. What this program gives you is the barest minimum, so I would encourage you to personalise it as you think fit. An ExampleAll a bit too much to take in? Don't worry, here's an example you can follow to get you started. We are going to create a neural net that takes three whole numbers in the range 0 to 100, and tells you whether they are in ascending order, descending order, or no particular order. Use the Create input controls feature to create three inputs. For the first control, type the caption First and select the Text Slot option (keeping the default upper limit of 100). Then create two more controls, Second and Third, also text slots in the range 0 to 100. After this, your input controls should look like this:  Now create three output controls, each of which is a checkbox. The first one should be called Ascending, the next Descending and the third No order. Your output controls should look like this: 
Click on the "Click here to train" button and wait for the count to reach 10,000 (It takes about three minutes on my machine). Then click on the "Click here to display the net" button and try it out! | ||||||||||||||||||||||||||||||

Neural network menu
